-
Weekly tasks
- Checking of new bibliographic/item records – Richard
See instructions
Monthly tasks
- Provisional authorities
- Provisional personal authors (100, 700) – Sinead
- Provisional corporate authors (110, 710) – Richard
- Provisional classmarks (084) – Dan
- Provisional publisher (264) – Caroline
- Provisional series (830) – Catherine
- Provisional subject headings (650) – Elaine / Catherine
- Provisional Wessex subject terms (650) – Catherine
- Orphan books – Sinead
- Import ClinicalKey marc records – Richard
- Import EBSCO nursing records – Catherine
Annual tasks
- E-book collections with items older than 10 years – run reports in January each year
- Oxford handbooks (Catherine)
- Kortext (Elaine)
Running monthly task reports
Go to AFO143 and select the Provisional Authorities report. Use the parameters below:
Personal authors (100, 700)
- Database equal to: 495
- Publish profile: AuthProvAuthors
Corporate authors (110, 710)
- Database equal to: 494
- Publish profile: AuthProvCorp
Classmark (084)
- Database equal to: 7998
- Publish profile: AuthProvClassmarks
Publisher (264)
- Database equal to: 7996
- Publish profile: AuthProvPublishers
Subject terms (650)
- Database equal to: 499
- Publish profile: AuthProvSubject
Series (830)
- Database equal to: 492
- Publish profile: AuthProvSeries
See document below for full instructions on how to run the reports and manage the authority records
-
Sublocations need to be created per location (it is not possible to create a sublocation and apply it globally).
On the homescreen, click on Change Institution/Location and select the location which has requested the new sublocation:

Go to AFO613. If the sublocation isn’t already created (check first), then click on New Sublocation:

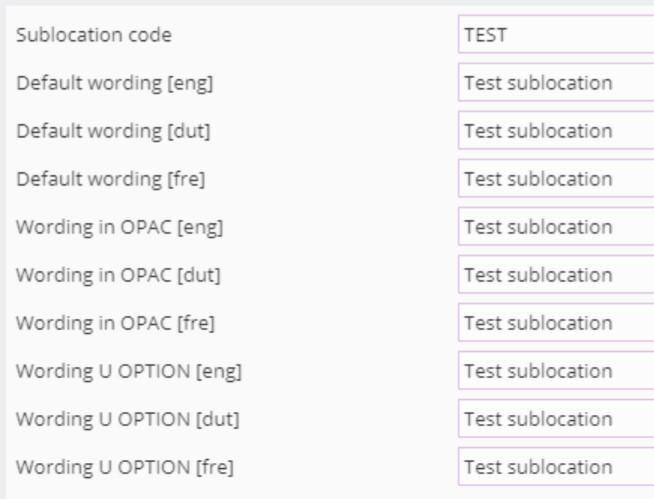
Enter a short code in capitals in the Sublocation Code field, then write it out in full in all the other boxes and save:

-
We currently have the following optional fields created:
- Retention note (optional field 1)
- Restricted shelf (optional field 2)
- Note for loan (optional field 3)
- Special collections (optional field 4)
- EXE-ITEMDATA $e (optional field 5)
- EXE-STATUS $s (optional field 6)
- EXE-VOLUME $c (optional field 7)
To create a new optional field, go to AFO469.
Select Item Definition Settings:

Click on Optional Fields:

Click on the next available optional field (make a note of which number optional field you picked).
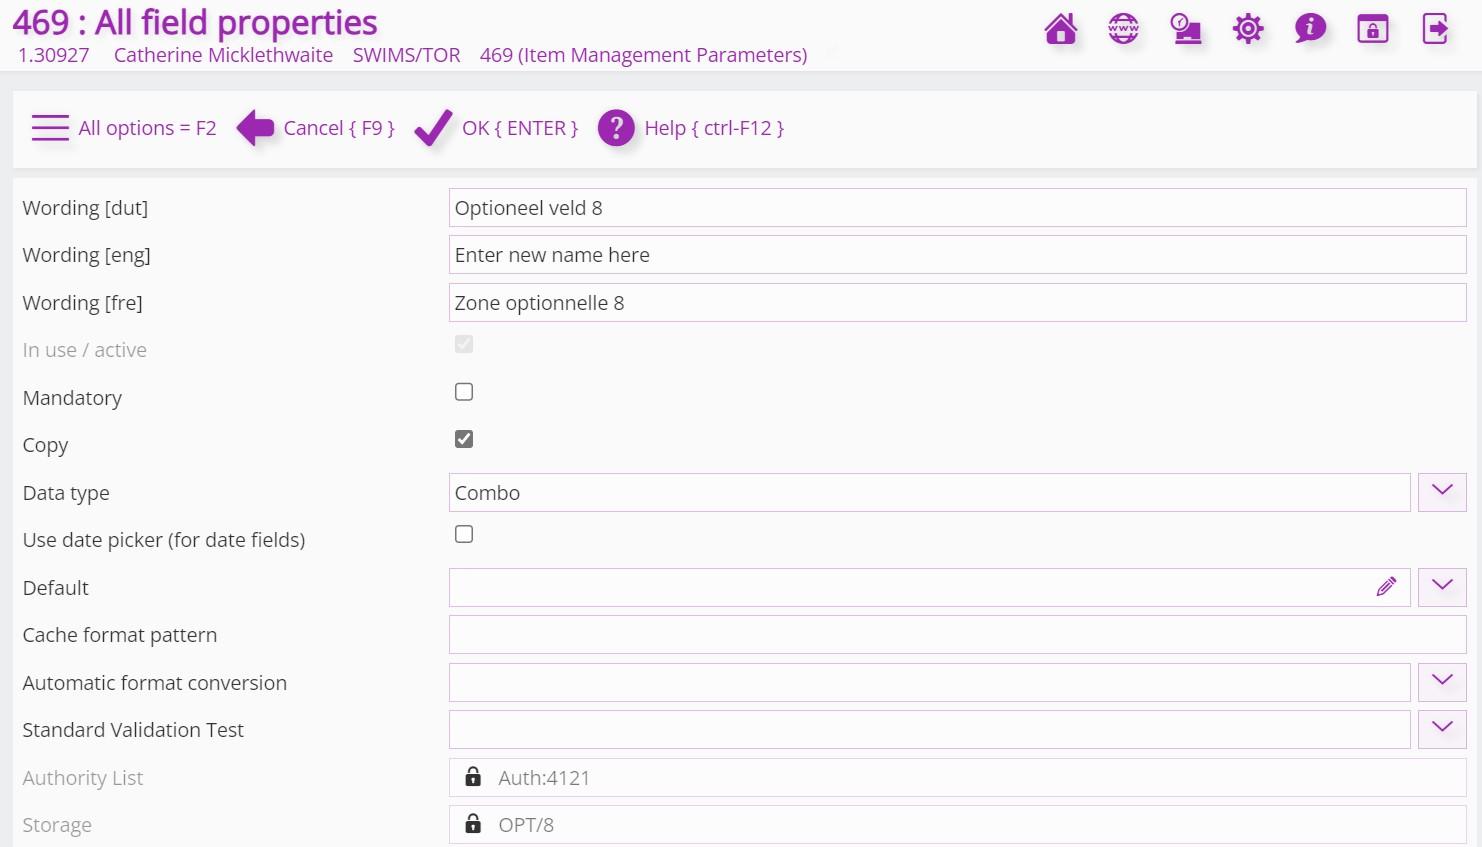
Enter the following parameters and click OK:
- Wording [eng] = enter what you want this field to be called
- Data type = Combo

Go back to the Item Management Parameters screen and select Data to be Entered:

In the Optional Fields box, make sure the new optional field you created is displayed. Do the same for Data to be Corrected and Data to be Displayed:


Go back to the Item Management Parameters screen and select Item Authority Lists:

In the drop-down, select the Optional Field number you just modified in the steps above.
Enter a short code for this, then put the full title into field 100 next to all the languages. Save the record.
-
See the FAQ How to unlock a ‘locked’ bibliographic record
If you still encounter an error message after unlocking it, we need to report this to Axiell. Depending on the circumstances in which it was locked, sometimes we are unable to unlock them fully and Axiell need to do this on their server.
Note – sometimes a record will unlock itself after around 45 minutes or overnight.
-
Locked authority records are a little different to locked records, they don’t always show in the list and need to be searched for individually. Use the following steps:
In AFO156, click on the ‘select a database’ icon
Select the appropriate database:- Corporate name (for corporate authors)
- Personal name (for authors)
- Publisher (for publishers)
- Uniform title (for series headings)
- Wessex classification (for classmarks)
- Wessex subject heading (for MeSH and Wessex subject headings)
Click on OK.
Click on the ‘specify an authority to unlock’ icon
Enter the authority ID of the record you want to unlock
If it is locked, a message will pop up asking if you’re sure you’d like to unlock the record, select yes.NB. The above steps will work most of the time. If the record cannot be found via this method, we need to report this to Axiell.
-
Use these instructions if someone has requested a labelled copy of an existing template.
Go to AFO153.
Click in the tickbox next to the template you’d like to make a labelled version of, then click on the Copy Template icon to make a copy:

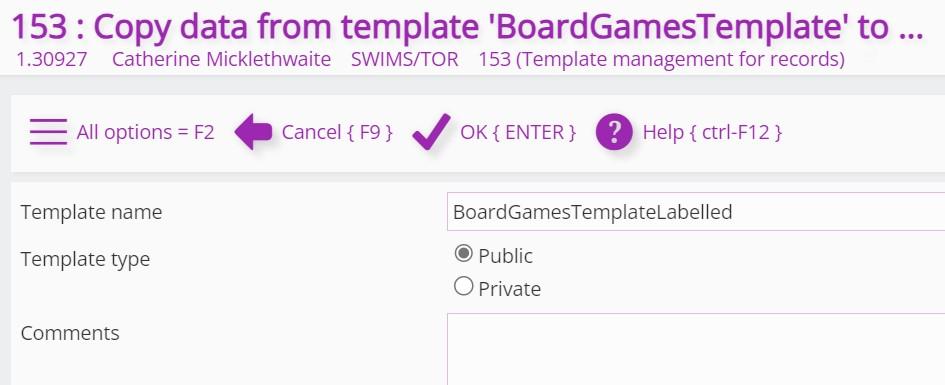
Use the following parameters:
- Template name = Enter the name of the template you are copying, then add Labelled to the end
- Template type = Public
- Comments = leave blank

Click on OK.
-
It is possible to download a savelist of records and re-import these to bulk add item records.
Process:
- Create a savelist of the bib records. Publish this with bib profile BULKADDITEMS – export as a spreadsheet, remove the top line (with the column headers), then save as a tab delimited txt file
- Update the conversion profile (AFO134) with details of the location and classmark. Depending on who you need to add holdings for, use one of the below:
- BULKADDITEMS if only adding a couple of item records,
- BULKADDALL if adding items for everyone (note if using this, it is too time consuming to alter the location and classmark within the conversion profile, quicker to do that when live in the item records).
- Input from file (AFO131) using the file created in step 1 and BULKADDITEMS load profile.
Full instructions in document below.
-
If someone stops subscribing to an electronic resource that is managed centrally, we need to remove their 856 entry. It is possible to remove this in bulk.
AFO134 modify 856remove conversion profile – change the conditions statements to display the appropriate 856$y linking text (copy and paste it from AFO113).
AFO132 run the 856export output profile giving the file a .txt filename and either a savelist OR a specific record ID.
AFO131 re-import the .txt file just created with input profile 856import.
Full instructions in document below.
-
It is possible to switch the view between the normal marc-coded screen and the screen detailing the full labels rather than the marc codes, i.e. from this:

to this:

and vice-versa.
Go to AFO111.
Find the record. On the Full Record screen, click on the Modify Technical Information icon:

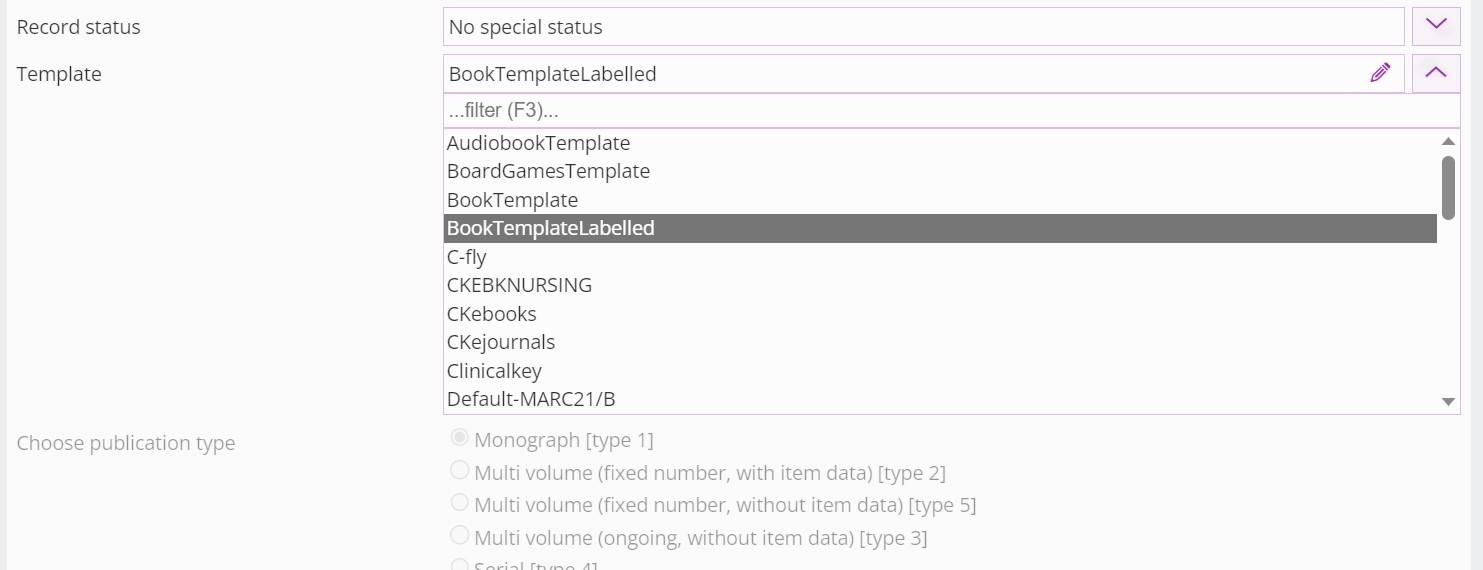
Change to template to either BookTemplate or BookTemplateLabelled as required to alter the display:

SWIMS NETWORK

Menu